In the competitive world of online marketing, simply having a website isn’t enough, you need to make sure it can be found. This is where Search Engine Optimization (SEO) becomes essential. Effective SEO improves your site’s visibility in search engine results, driving more organic traffic and increasing your reach. While SEO might seem complex, the Yoast SEO plugin simplifies the process.
As one of the most widely-used SEO tools for WordPress, Yoast SEO offers user-friendly features that help you optimize your website effortlessly. Whether it’s improving your content’s readability, refining meta descriptions, or ensuring your site follows best SEO practices, Yoast provides valuable insights and real-time feedback to enhance your ranking.
In this guide, we’ll explore how you can leverage the Yoast SEO plugin to enhance your website’s SEO. By following these steps, you’ll be able to improve your content, make your site more search-engine-friendly, and ultimately attract more visitors.
1. Install and Configure the Yoast SEO Plugin
Before you can begin optimizing your site with the Yoast SEO plugin, you’ll need to install and configure it correctly. If you want access to extra features, you’ll need the paid version, available on the official Yoast website. For this guide, we’re using the free version. Follow these steps to get started:
Step 1: Install Yoast SEO
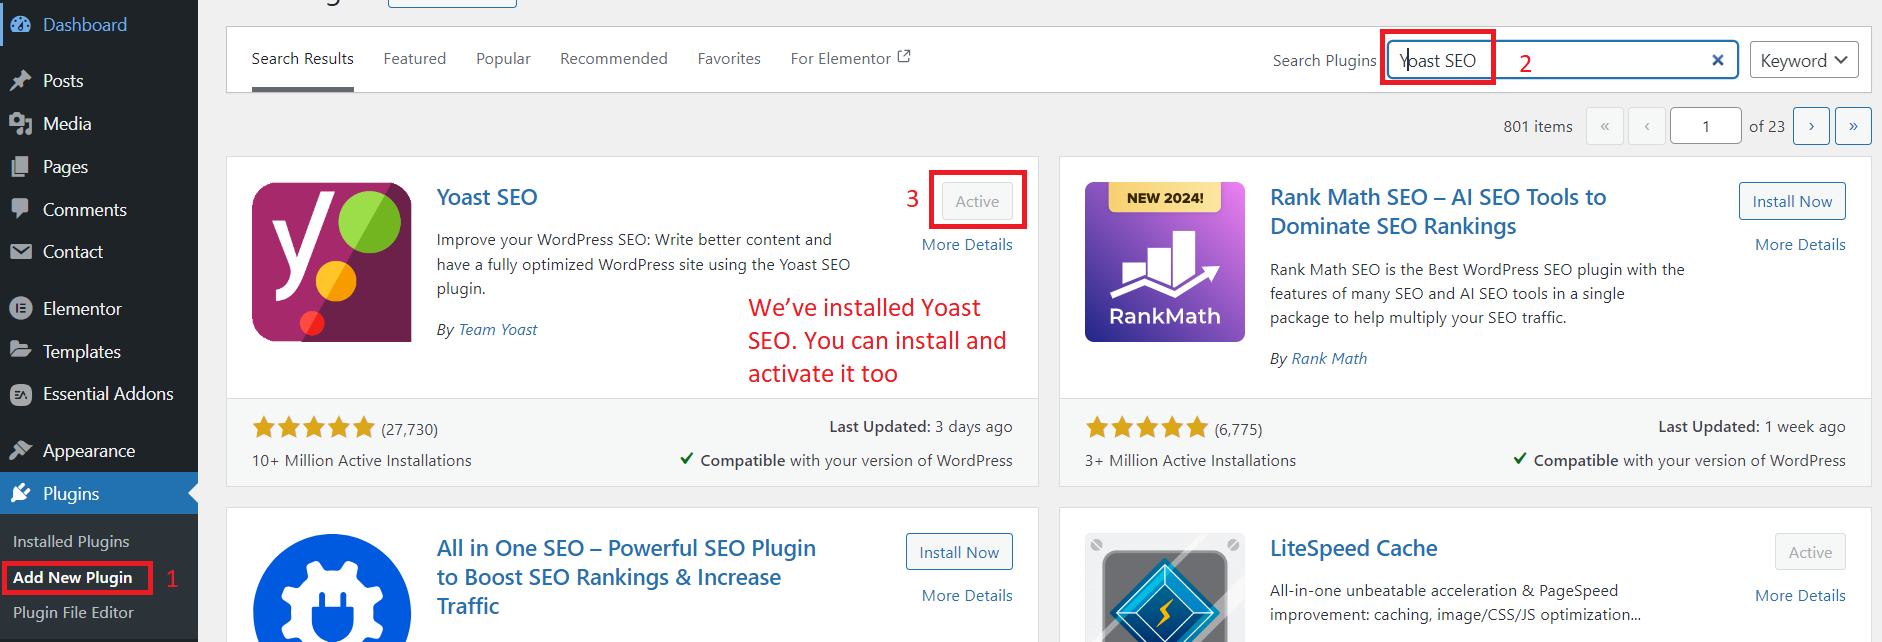
- In your WordPress dashboard, navigate to Plugins > Add New.
- In the search bar, type Yoast SEO.
- Once you find it, click Install Now and then Activate.
After activation, you’ll see a new menu item labeled SEO in your WordPress dashboard.
Step 2: Configure Yoast SEO
Yoast SEO offers a setup wizard that guides you through the basic configuration process. This is a great starting point if you’re new to SEO.
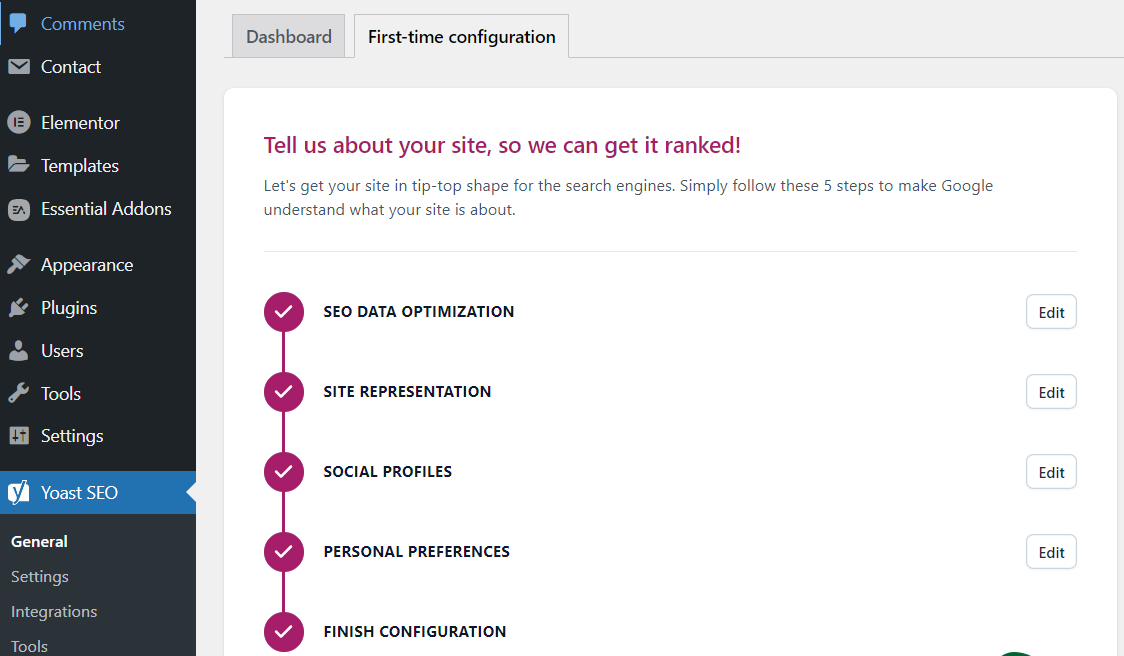
- Click on SEO in your dashboard, and select General.
- Go to the Configuration Wizard tab and click Open the Configuration Wizard.
- The wizard will walk you through key settings such as:
- Site Type: Define whether your site is a blog, online store, news site, or something else.
- Organization/Person: Choose whether your website represents a business or an individual.
- Search Engine Visibility: Ensure that you allow search engines to index your site.
- Number of Authors: Indicate whether your site has multiple authors, which helps with author archives.
Step 3: Set Up XML Sitemaps
Yoast SEO automatically generates an XML sitemap for your website, which is essential for helping search engines like Google crawl and index your pages.
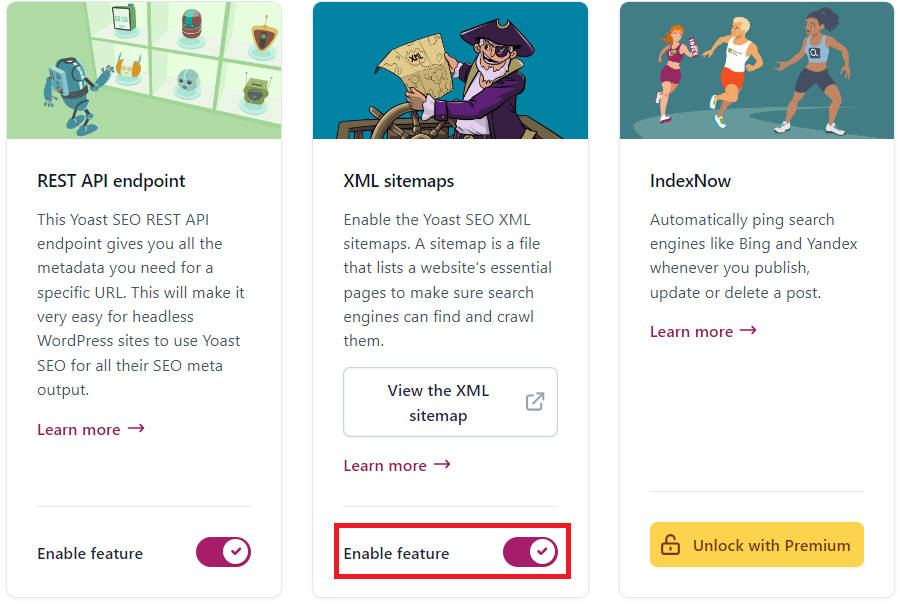
- Go to SEO > General > Settings.
- Ensure the XML Sitemaps option is turned on (it should be enabled by default).
- You can view your sitemap by clicking the question mark next to this feature and selecting See the XML Sitemap.
Step 4: Connect to Google Search Console (Optional but Recommended)
Google Search Console allows you to monitor your website’s search performance. You can easily integrate it with Yoast SEO or you can integrate any other method as well.
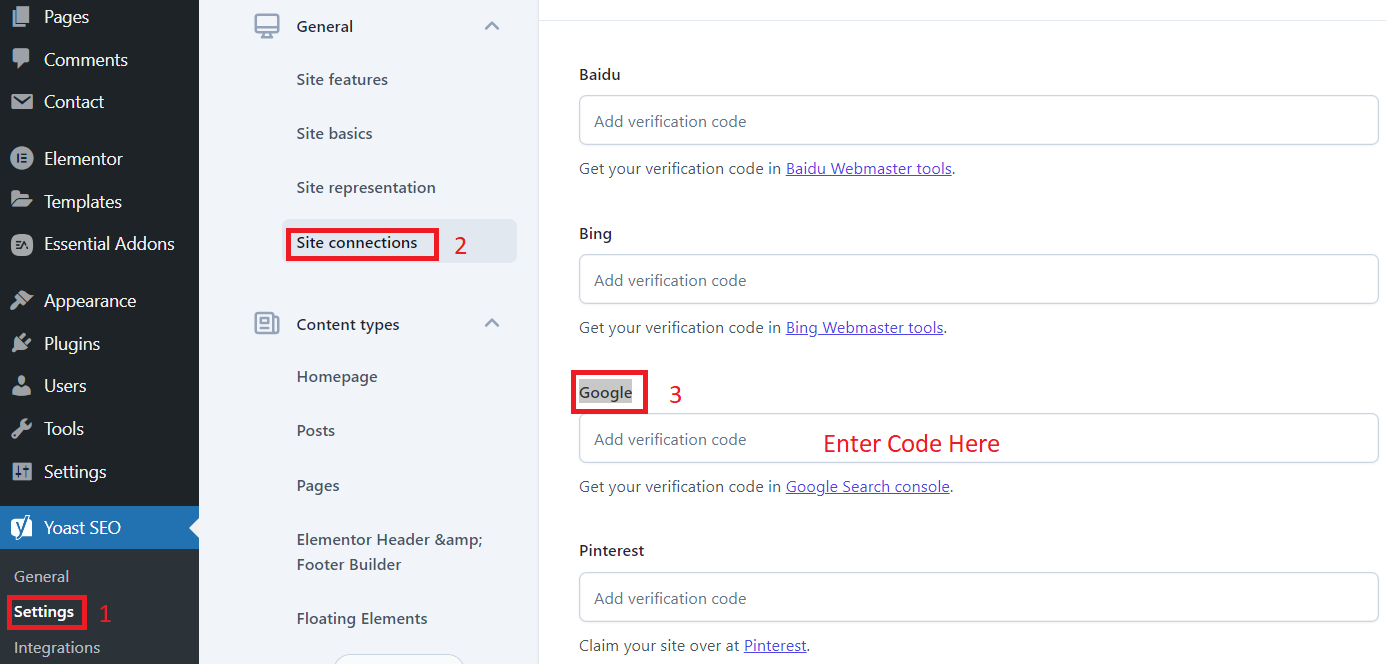
- Go to SEO > Settings> Site connections> Google.
- Enter your Google Search Console verification code to link your site and start tracking important SEO metrics.
By installing and configuring Yoast SEO, you’ve laid the foundation for a well-optimized website. The plugin’s automatic features, like the XML sitemap and Google integration, help search engines discover and index your content quickly and efficiently.
2. Optimize Your Content with Yoast SEO
One of the most powerful features of the Yoast SEO plugin is its ability to optimize your content for both search engines and readers. Here’s how to make the most out of its content optimization tools:
Step 1: Keyword Research and Focus Key phrase
Before optimizing, identify the focus keyword you want to rank for. This is the primary term people will search for to find your content. Use tools like Google Keyword Planner or Ubersuggest to find relevant keywords with good search volume and low competition.
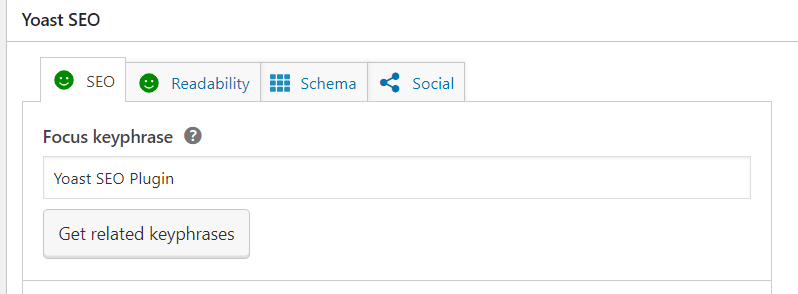
How to Use the Focus Key phrase Feature:
- After writing your content, scroll down to the Yoast SEO box below the post or page editor.
- In the Focus Key phrase field, enter the main keyword you want to target.

- Yoast will analyze your content and provide feedback on how well your page is optimized for that keyword.
Step 2: Optimize Keyword Usage
Yoast will evaluate your content and show recommendations on where to improve keyword placement. To fully optimize your page, aim to include the focus key phrase in the following areas:
- Page Title: Make sure your key phrase is in the title of your content.
- Subheadings (H2, H3, etc.): Use the keyword in at least one subheading for better keyword distribution.
- First Paragraph: Include your keyword naturally within the first 100 words.
- Body Text: Ensure that your keyword appears throughout the body but avoid keyword stuffing. Yoast’s feedback will indicate whether your keyword density is too low or too high.
- URL Slug: Your URL should be short and contain the key phrase.
- Meta Description: This is the snippet that appears in search engine results. Yoast allows you to customize it, and it’s crucial to include your focus keyword here to entice users to click.
Step 3: Utilize Synonyms and Related Keywords
In addition to your focus keyword, Yoast encourages the use of related keyphrases or synonyms. This makes your content more comprehensive and helps you rank for a broader set of search terms.
- Scroll down to the Yoast SEO box and click the Related Keyphrase section (Optional Not Recommended).
- Enter any relevant terms or variations of your focus key phrase. Yoast will analyze and provide feedback on the inclusion of these terms in your content.
Step 4: Readability Optimization
Yoast SEO doesn’t just analyze keywords, it also helps you ensure that your content is easy to read. Under the Readability tab, Yoast assesses:
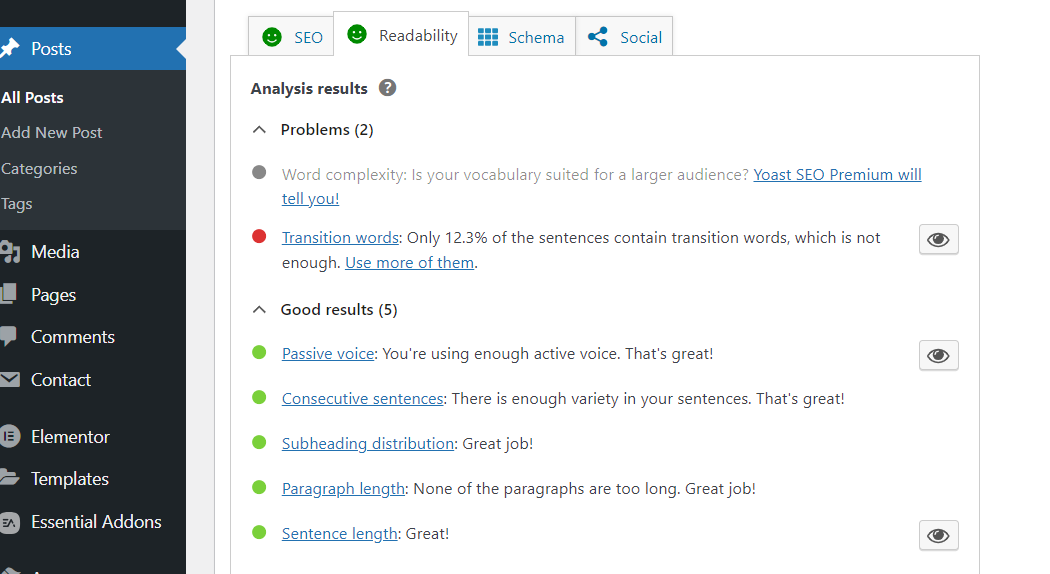
- Sentence Length: Avoid overly long sentences. Aim for a mix of shorter and medium-length sentences.
- Paragraph Length: Break up long blocks of text to improve readability.
- Transition Words: Use words like “however,” “therefore,” or “in addition” to create flow in your content.
- Passive Voice: Minimize the use of passive voice to make your writing more engaging.
Each of these factors is rated, and Yoast provides tips for improving them. The goal is to make sure your content is both SEO-friendly and reader-friendly.
Step 5: Image SEO
Images play a significant role in both user experience and SEO. Yoast helps ensure your images are optimized by reminding you to: 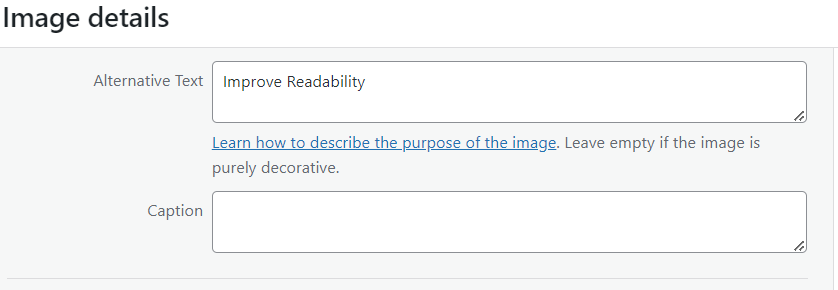 Use Alt Text: Add descriptive alt text to every image, and where appropriate, include your focus keyword.
Optimize File Names: Use keyword-rich file names for images before uploading them to your site.
Step 6: Content Analysis Feedback
Once you’ve implemented Yoast’s suggestions, the plugin will give your page a score. It uses a simple color-coded system:
- Green: Your content is well-optimized for SEO and readability.
- Orange: There’s room for improvement.
- Red: Significant SEO issues need to be addressed.
Pro Tip: Use Cornerstone Content
Yoast allows you to mark essential, long-form content as cornerstone content. These are the main articles or pages that provide the most comprehensive information on a topic, and they should be internally linked frequently.
To mark a piece as cornerstone content:
- In the Yoast SEO box, under the Focus Key phrase section, check the Cornerstone Content box.
- Make sure you link to this cornerstone content from other pages, increasing its internal SEO value.
3. Optimize Meta Tags
Meta tags play a crucial role in how search engines and users perceive your content. Yoast SEO helps you optimize these tags to improve your visibility in search results. Here’s how:
Step 1: Edit the SEO Title
Your SEO title is the clickable headline that appears in search results. It should be compelling and include your focus keyword.
- Keep it under 60 characters so it doesn’t get cut off.
- Make sure the keyword appears naturally, preferably toward the beginning.
To edit:
- Scroll to the Yoast SEO box below your content editor.
- In the SEO Title field, you can customize your title by typing directly or using Yoast’s placeholders.

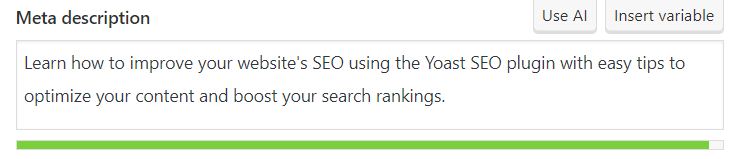
Step 2: Customize the Meta Description
The meta description is the snippet of text shown under the title in search results. Though it doesn’t directly affect rankings, a well-written meta description can improve your click-through rate (CTR).
- Keep it under 160 characters.
- Include your focus keyword to show relevance to searchers.
- Write a compelling summary that encourages users to click.
To edit:
- In the Yoast SEO box, fill in the Meta Description field with a concise, keyword-rich summary.
Step 3: Optimize the Slug (URL)
The slug is the part of the URL that comes after your domain name. A clean, concise slug that includes your keyword helps both search engines and users understand what the page is about.
- Keep it short and relevant.
- Avoid unnecessary words (e.g., “the,” “and”).
- Include your focus keyword.
To edit:
- Look at the URL Slug section in the Yoast SEO box and adjust the text to reflect your keyword.

Step 4: Preview Your Snippet

Yoast SEO provides a preview of how your title, meta description, and URL will look in search results. Use this to check if everything fits and appears well-structured.
Set Up a Solid Internal Linking Strategy
Internal linking helps guide users through your site and improves SEO. Here’s how to use Yoast SEO for an effective internal linking strategy:
- Add Relevant Links: Link to related content within your site. Use descriptive anchor text that clearly indicates what the linked page is about.
- Use Cornerstone Content: Mark key articles as cornerstone content in Yoast. These are your main, in-depth pieces that deserve more internal links.
- Maintain Clear Structure: Ensure your links create a logical flow. Link more frequently to important pages and keep less critical pages linked less often.
- Check for Broken Links: Regularly look for and fix any broken internal links. This keeps your site user-friendly and helps with SEO.
5. Utilize Schema Markup and Rich Snippets
Schema markup helps search engines better understand your content, and rich snippets display enhanced information in search results, such as ratings, prices, and FAQs. With Yoast SEO, you can easily add schema markup to your pages without coding.
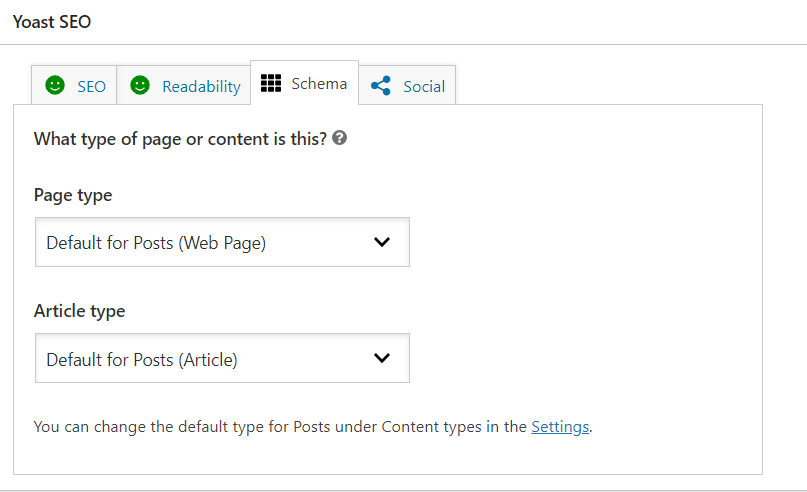
Yoast automatically includes essential schema data for posts and pages. To further customize it, simply:
- Go to the “SEO” section in your WordPress dashboard.
- Under “Search Appearance,” configure how you want your content to appear in rich results.
- For specific content types, choose from Article, FAQ, How-to, and more.
Using schema markup improves visibility in search results, driving more clicks to your site by enhancing how your content is presented.
Conclusion
Optimizing your website with the Yoast SEO plugin is a powerful way to improve your search engine rankings and enhance user experience. By focusing on content optimization, readability, meta tags, internal linking, and schema markup, you can create a site that not only attracts visitors but also keeps them engaged.
If you’re looking for expert guidance in enhancing your online presence, The Sun Media House is here to help. Our team specializes in SEO strategies tailored to your needs, ensuring that your website stands out in the crowded digital landscape. Contact us today to get started on your journey to better visibility and success!